Black-headed Grosbeak and American Goldfinch! -Farmer Brian

-
Join 85 other subscribers
Archives
Links
School Farm Facebook page

Black-headed Grosbeak and American Goldfinch! -Farmer Brian
Our students harvested and stocked the farm stand today (Thursday 5-9) with radish bunches, spinach, arugula, bok choy, lettuce and salad turnips! I didn’t have time (translation: forgot) to take any pictures but it all looks great. Something salad this way comes! -Farmer Brian
Last Thursday our crew of high school students harvested some fresh vegetables from our gardens and stocked the farmstand for the first time this year! It’s been cold and wet and things are behind where they were last year but finally we’ve got arugula, bok choy, radishes, salad turnips, rhubarb, lettuce and salad mix all coming on now or very soon. I checked the stand today and we’ve still got arugula, radishes and lots of bok choy still available! We will harvest again on THURSDAY, and we’ll add more of all the aforementioned veggies. Vegetables are available by suggested donations, and payment is through a QR code, posted at the farmstand. Come one, come all!


So far we’ve had many many visitors from just a few species of birds at our feeder/camera. White-crowned sparrows, dark-eyed juncos, house sparrows, house finches and spotted towhees. We’ve had a few visits from some brown-headed cowbirds recently as well, but today I want to give a shout-out to our pine siskins! Lately we’ve had a lot of them visiting us. These are related to finches but they have really sharp bills – that you can see nicely in this little video here! We are looking forward to more new visitors as Spring and Summer keep rolling along.
Thanks for stopping by! -Farmer Brian
Last year we received a generous grant from the Whidbey Island Garden Tour to help us complete a few projects intended to improve the bird life at the elementary school garden. The Whidbey Island Garden Tour is a wonderful local organization whose mission is to provide funding to local causes and nonprofit organizations supporting the improvement, restoration, education and maintenance of our shared Whidbey Island habitat. Every Summer they organize a tour of many of Whidbey Island’s spectacular private gardens. This year’s tour will happen on June 22nd. To learn more, please visit their website at https://www.wigt.org/.
We have three projects that we are using the grant money for. First, we installed a nest box for barn owls, which has yet to be taken by a breeding pair but we remain hopeful for this year and future years.

Our barn owl nest box!
Second, we installed a bird feeder with a motion-activated camera near our willow grove and with easy viewing from our solar barn outdoor classroom. Though we unfortunately won’t be able to embed a livestream page, we have added a link in the primary menu above where we will post our most recent and most interesting bird sightings.

Our new bird feeder/camera!
Here are just a couple images to get you started – click the link above to see more! So far we have had spotted towhee, black-capped chickadee, white-crowned sparrow, house finch and dark-eyed junco visit, but we expect many more!

Dark-eyed junco

Black-capped chickadee
Our last project we are just getting started on, installing a raptor pole! We hope this will allow raptors to visit our farm more frequently and take advantage of our vole population.
Thanks for visiting! -Farmer Brian
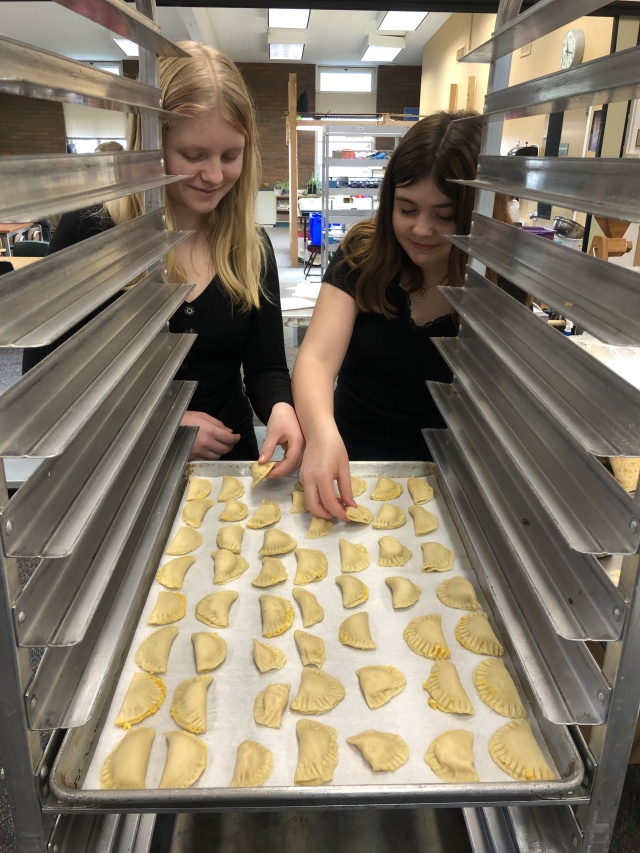
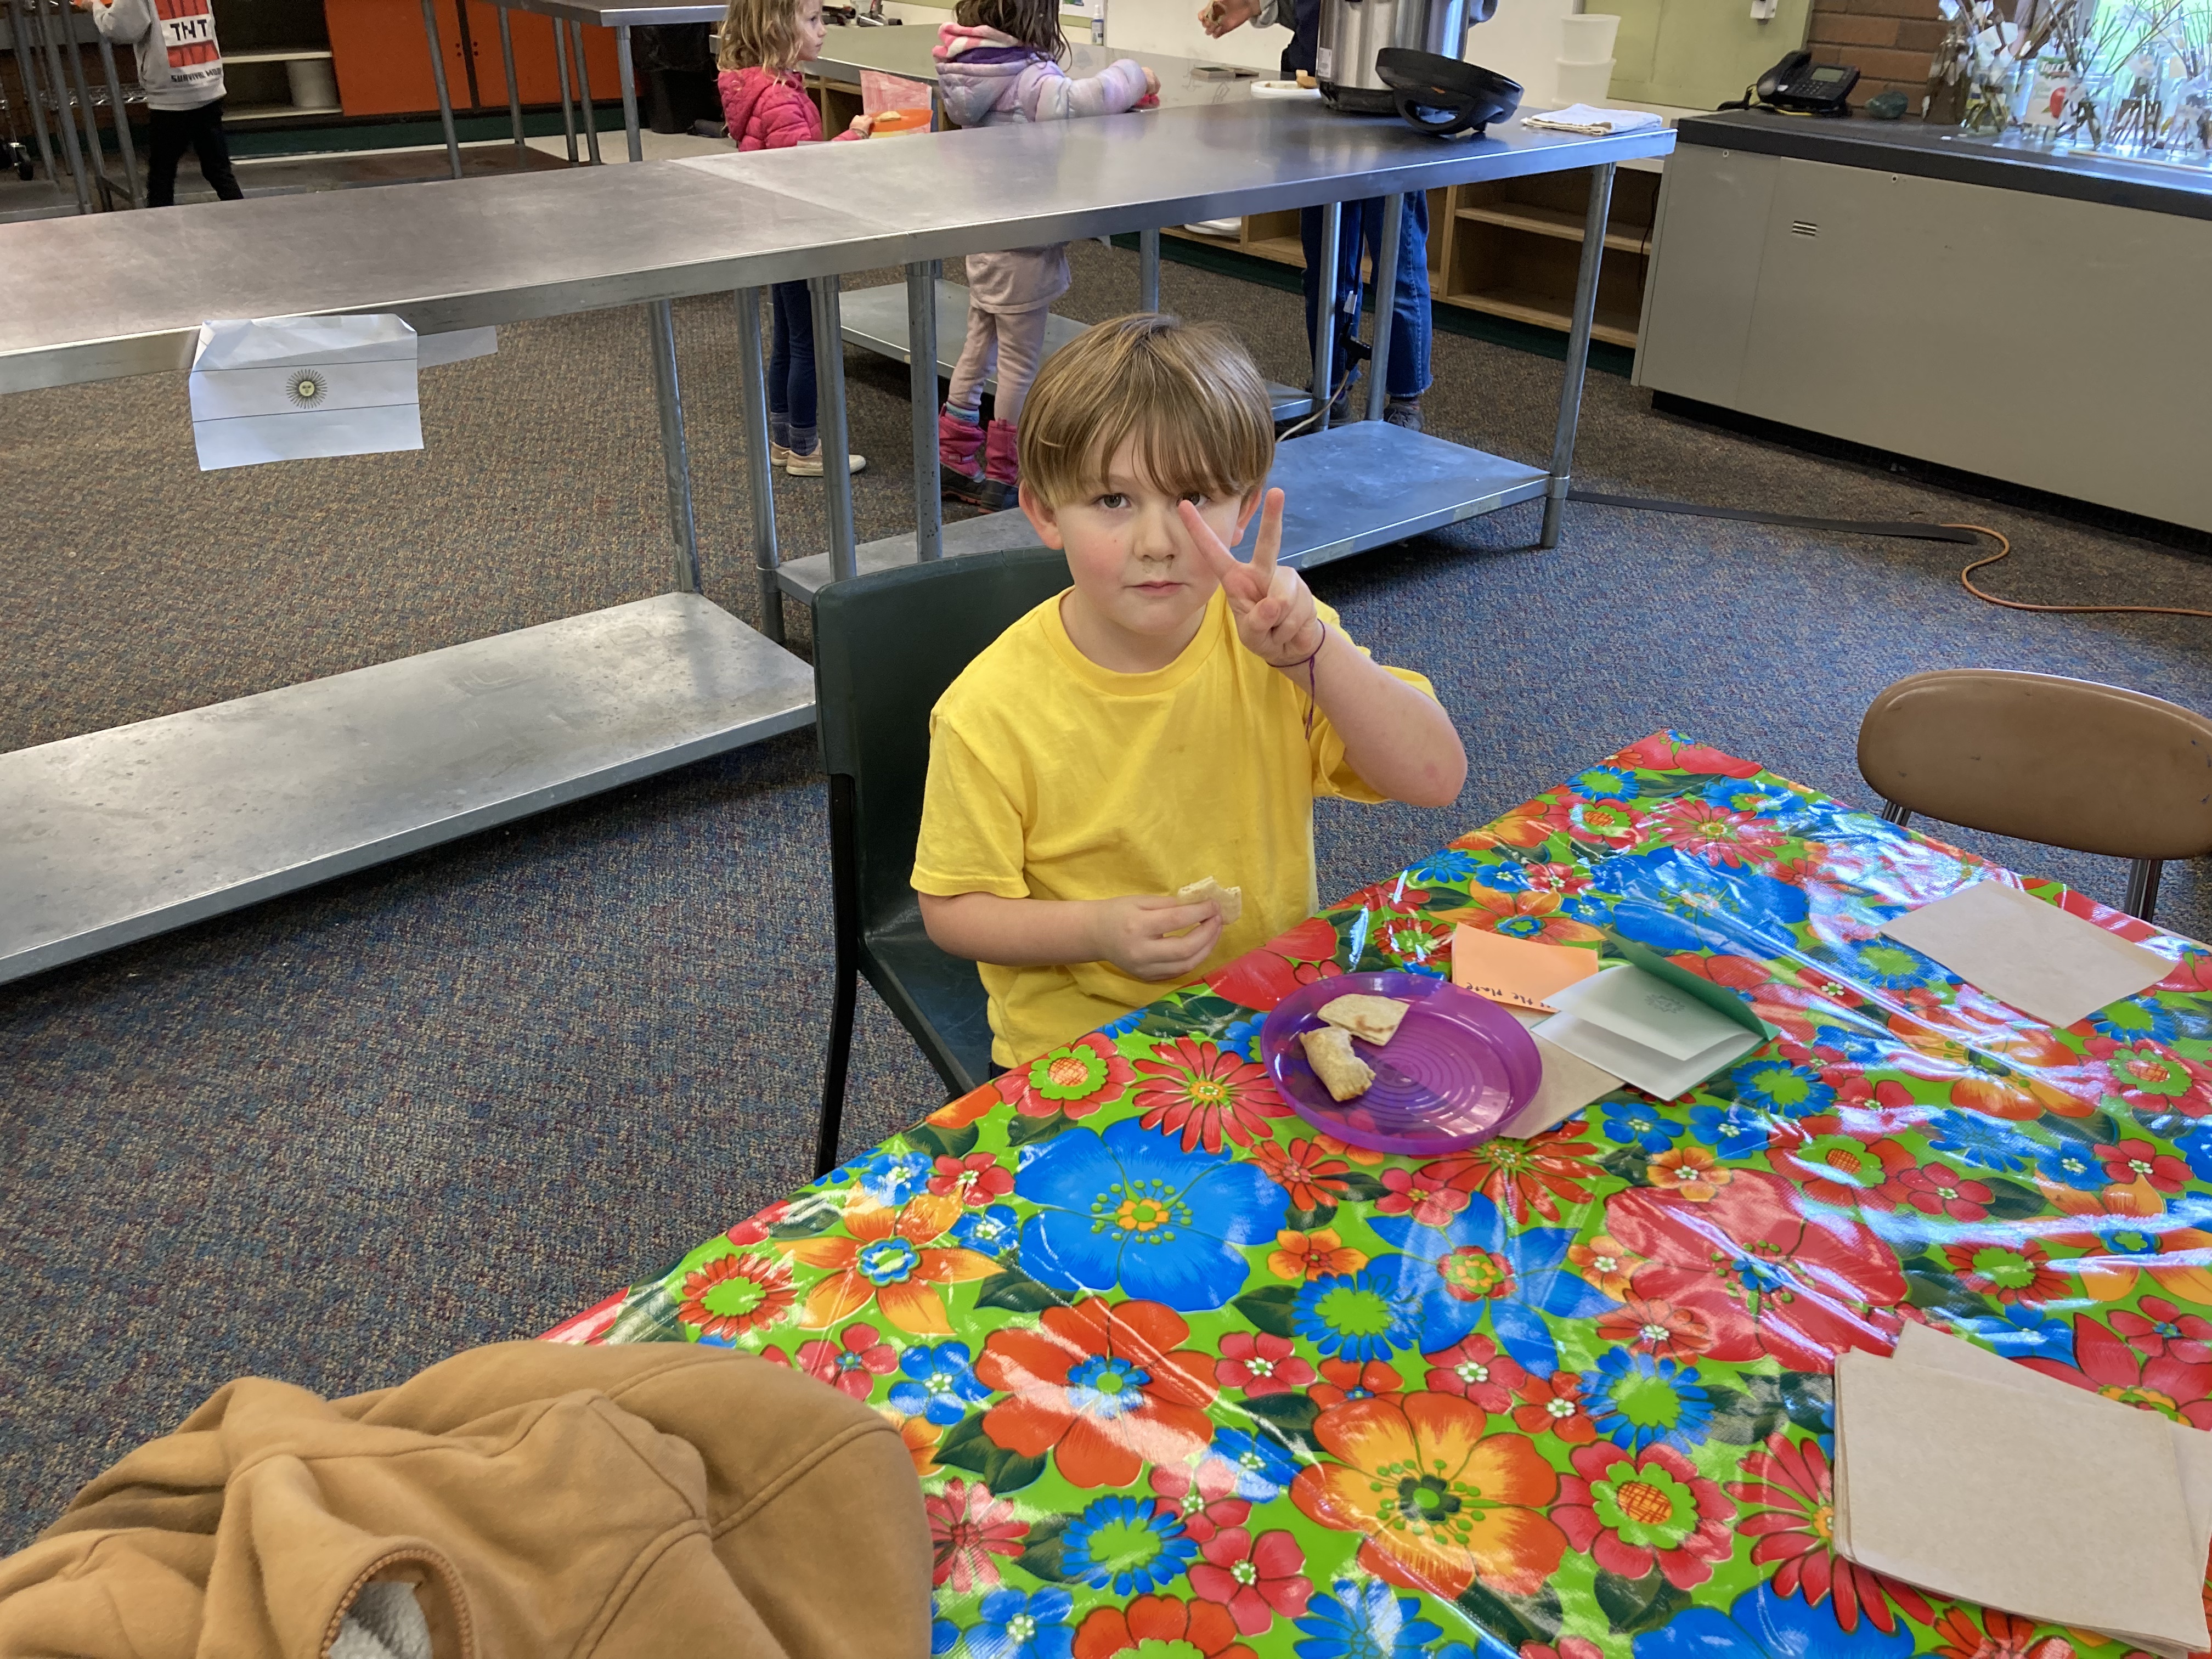
In mid-January the fifth graders began the month-long process of planning, preparing, and cooking all the food necessary for our Pass the Plate event. They cooked four dishes from around the world and helped to feed all of our kindergarteners, first, second, third, and fourth graders a delicious and adventurous meal. The fifth graders planned and worked for weeks to make this event possible.
The fifth graders made pita bread and two different kinds of tzatziki (one with cucumbers and one with chard) from Greece, empanadas (with potatoes and squash from our garden) from Argentina, and atakilt wat (a vegetable stew with carrots, cabbage, and potatoes) from Ethiopia.
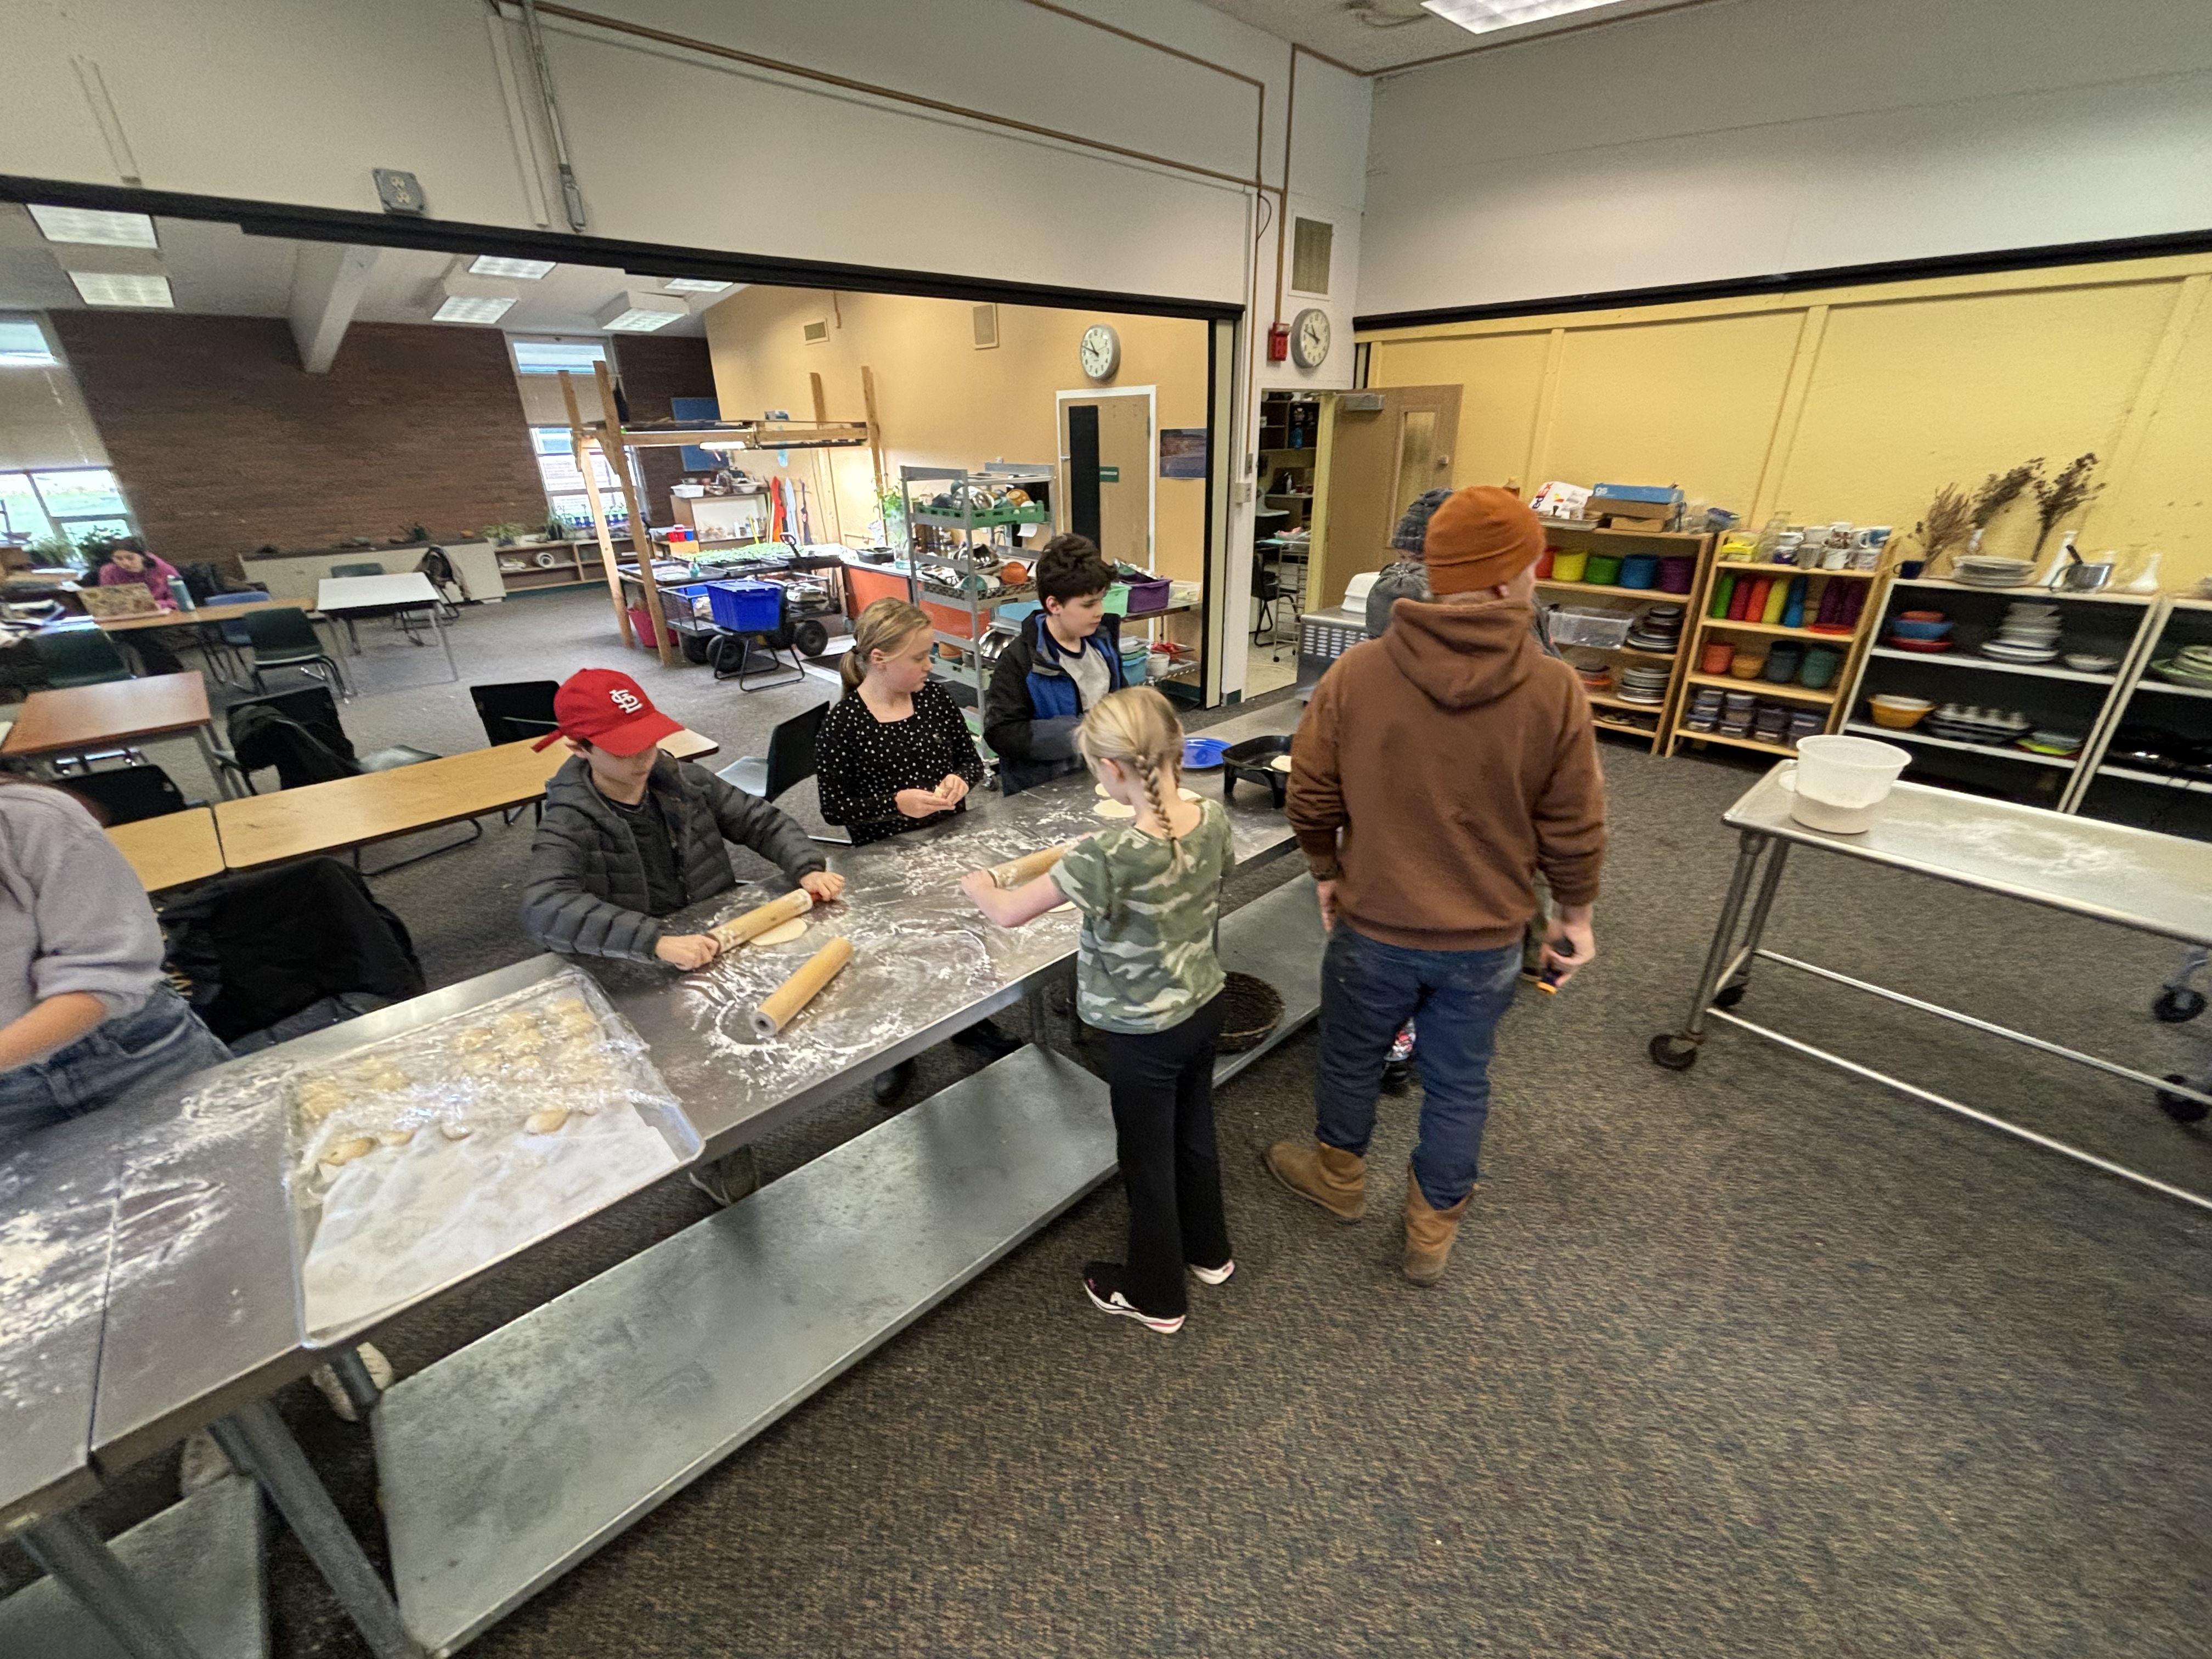
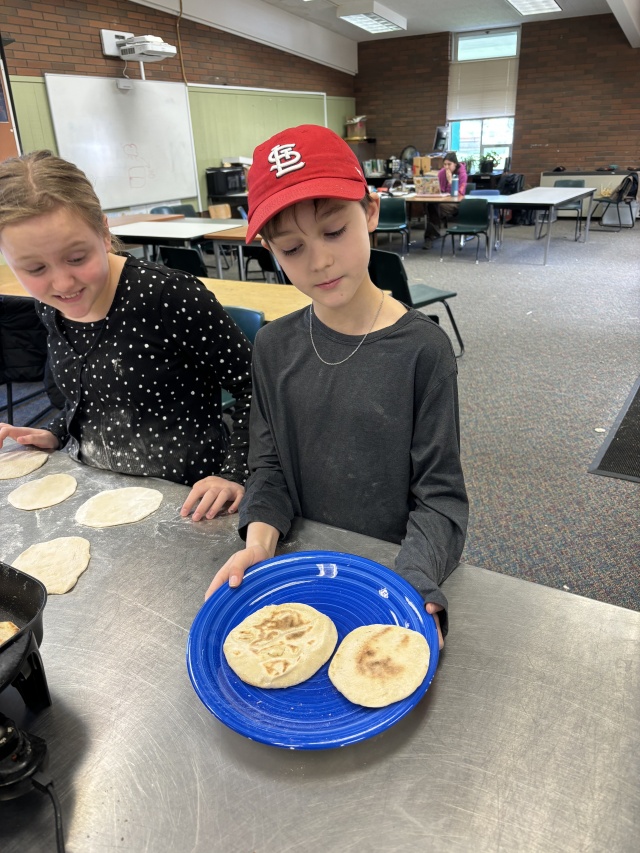
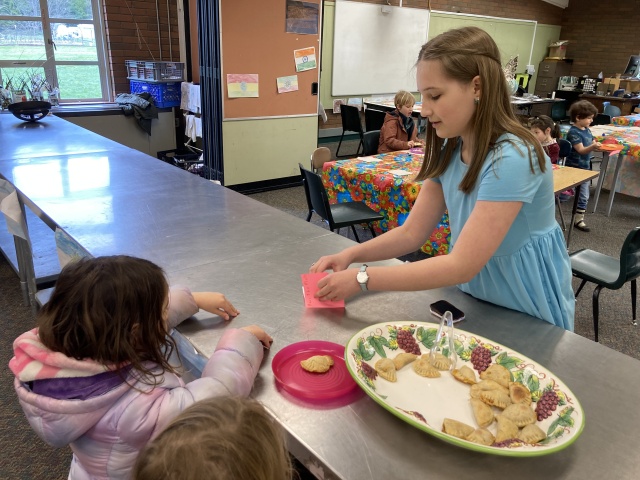
The fifth graders signed up for time slots to serve all the younger farm classes. The younger kids went around to each country with their little DIY “passports” and received a stamp and a serving of the dish from that country. The fifth graders served over 350 students over the course of the week. The younger kids loved trying so many delicious and new foods and the fifth graders proved to be great servers and leaders! We are so pleased with our fifth graders and their dedication and hard work, and we can’t wait to do it again next year!
Recipes:
Dough
| INGREDIENTS | MEASUREMENTS (yields ~ 24 mini empanadas) | x2 RECIPE (yields ~48 mini empanadas) |
| All-purpose Flour | 2 cups | 4 cups |
| Salt | ½ tsp | 1 tsp |
| Cool Water | ⅓ cup | ⅔ cup |
| Oil | ⅓ cup | ⅔ cup |
Potato Pumpkin Filling
| INGREDIENTS | MEASUREMENTS (yields ~ 24 mini empanadas) | x2 RECIPE (yields ~ 48 mini empanadas) |
| Squash Puree | 2 cups | 4 cups |
| Potatoes | 2 cups | 4 cups |
| Shredded cheese | 1 cup | 2 cups |
| Cumin | ½ tsp | 1 tsp |
| Chili Powder | ½ tsp | 1 tsp |
| Onion Powder | ½ tsp | 1 tsp |
| Paprika | ¼ tsp | ½ tsp |
Instructions
Dough:
Potato Pumpkin Filling:
Shape and Bake the Empanadas:
Makes ~24 mini empanadas
*Notes:
Ingredients:
 2 tsp olive oil
 2 cloves garlic minced
 1 tsp minced ginger
 1/2 cup chopped onion
 1/4 tsp cumin powder
 1/2 to 3/4 tsp turmeric powder
 1/4 tsp cardamom powder
 1/4 tsp cinnamon powder
 1/8 tsp cloves powder
 a generous dash of black pepper
 3/4 cup sliced carrots
 2 medium potatoes chopped, 1.5 loaded cups
 1/2 head of cabbage finely chopped
 1/2 tsp salt
Instructions:
 In a large skillet, add 1 tsp oil and heat at medium-low. Once hot, Add garlic, ginger, and onion. Mix and cook for 4 minutes.
 Add the cumin, turmeric, cardamom, cinnamon, cloves and black pepper. Mix and cook for 3 minutes to infuse the oil and to continue cooking the onion to golden.
 Add the carrots, potatoes and mix well. Add cabbage and 1/4 tsp salt. Mix well, cover and cook for 15 minutes. Stir once in between.
 Add 1/4 tsp or more salt, and 1 tsp olive oil. Mix in. Deglaze at this time with water if needed. Cover and Cook for another 15 minutes or until the potatoes are tender.
| INGREDIENTS | MEASUREMENTS (yields ~ 3 breads / 18 pieces) | x12 RECIPE (yields ~ 210 pieces) |
| Lukewarm Water | 1 cup | 12 cups |
| Active Dry Yeast | 2 tsp | 24 tsp → 0.5 cup |
| Sugar | ½ tsp | 6 tsp |
| All-Purpose Flour | 3 cups, divided | 36 cups |
| Kosher Salt | 2 tsp | 24 tsp → 0.5 cup |
| Olive Oil | 2 tbsp | 24 tbsp → 1.5 cups |
Make sponge:
Form the pita dough:
Knead the dough:
Let the dough rise.
Divide the dough.
Roll the Dough & Cook
For Gluten Free Pita: Replace the flour here with the same amount of an all-purpose gluten free flour.
**Make ahead note: You can prepare the dough ahead of time. Once it has risen, you can store it in the fridge until you need it! If you don’t want to bake all 8 pitas on a given day, you can bake 1, 2 or however many you need at a time. Save the rest of the dough in the fridge for later (if stored properly, the dough will keep in the fridge for up to 1 week).
3 to 4 large leaves of Swiss chard, ribs removed1c plain Greek yogurt1 1/2 T chopped fresh mint leaves1 garlic clove, finely choppedsalt & pepper to taste1 T extra virgin olive oil1 t lemon zest1 T lemon juiceMAY 4, 2019
This year, we implemented a brand new water cycle curriculum for our 3rd grade farm students. This lesson plan spanned approximately 6 weeks so the students could meaningfully engage with the stages of the water cycle.
The 1st week was all about introducing the water cycle to the students at a broad scale. At this stage, the students discussed what they already knew about the water cycle – most of the students already knew some of the phase changes: evaporation, condensation, precipitation. To solidify their foundation of the water cycle, each student drew a picture of what they know now of the water cycle.


On the 2nd half of the 1st week, when classes returned to us for the 2nd time, we started a discussion about PRECIPITATION. Many of our students brought great information and definitions of precipitation, so to ground this lesson in the scope of our farm, we studied a rain barrel! The rain barrel for this lesson was set up a few weeks beforehand, and it has steadily been catching our winter rain and melting snow from the roof of our solar barn. We had each student take a yard stick, dip it into the rain barrel until it touches the bottom, pull it back out and take note of the number where the water line stops. Once each student was done, we compared and shared our results and noted them on a whiteboard, to record for future reference.


This lesson is important for getting students acquainted with taking scientific measurements, learning water conservation practices, and planting the seed of the difference between rainfall measurements and rain barrel collection measurements.
Week 2 is all about EVAPORATION. We set up an experiment with 2 bowls, filled with a small amount of water, placed under our growing station. This location is important because of the grow lights positioned overhead that produce heat for this experiment (these lights will act as our representative “sun”). One bowl is left uncovered, and the other bowl is covered with plastic wrap. After setting up the experiment, we had a discussion on our hypotheses. A few students stated some ideas of water droplets forming on the plastic wrap – their minds are already stirring about condensation!
On the 2nd half of week 2, classes returned to check on the results of our experiment and to reflect back on our previous hypotheses, while conducting another discussion on the process that is happening between the 2 different bowls.


As the precipitation falls, some of the water may evaporate, but some of it may also go through TRANSPIRATION, our topic of week 3! This was a new one for many students – so we really honed in on closely studying this topic. To demonstrate the process of transpiration, we set up 2 different cups: 1 with red food coloring, 1 with blue food coloring, and even some with purple food coloring! Next, we put sticks of celery into each cup, to let them drink up until next class.
During this stage, we heard some spouts of curiosity of students understanding that plants drink water, but wondering what role the food coloring plays in this experiment. Some students were even connecting the dots to last week’s topic by hypothesizing that some of the dyed blue water would evaporate into the air!
The next time we saw the students, we checked on our celery to see what happened! The food coloring made is easier to see how water moves up a plant through the xylem, to fully hydrate the plant all the way to the leaves. We then discussed what happens when the food coloring reached the top of the celery plant, ultimately deciding that some of the water evaporates off the leaves, leaving the color behind!


The topic of week 4 is CONDENSATION. A few weeks ago, Farmer Hannah and Farmer Julian built a fog catcher on the farm comprised of a fine mesh, twine, PVC pipe, and a collection bucket. We went over how as a cloud of fog moves across the farm in the early morning hours, it gets caught in the mesh. As more and more mist settles on the mesh, it turns into larger water droplets and slides down the mesh, where it lands in the PVC pipe. The PVC pipe is slanted downward, so the water flows down the pipe and into the collection bucket. To demonstrate this, we played a game, similar to tag, where the person / water vapor who is “it” runs around collecting other water vapors in order to grow into a larger water droplet!
This lesson is great at showing the seemingly invisible aspects of the water cycle, and adds to the water conservation discussion brought up from the precipitation lesson. We are teaching our students that you can obtain water from a variety of different sources!

Week 5 has the students reflecting on their previous investigation into the soil cycle as we delve into SURFACE INFILTRATION. For this lesson, the students set up an experiment by putting 3 different types of soil into 3 different containers: 1 container has clay, 1 container has silt, 1 container has sand. After the containers are filled with their respective soil, we made our hypotheses on which would drain water the fastest / slowest. We then poured water on them to see how quickly the water drains from each type of soil.
As a follow up, we did a deep dive into the reasoning behind the difference of water flow with a classroom discussion. To get students thinking, I posed the question: “If you were a plant, which type of soil would you like to live in?”

For the second half of this week, we covered SURFACE RUNOFF – our last topic of the water cycle. This lesson builds slightly off of last week’s lesson as students will be investigating how water runs off different surfaces: grass, dirt, and concrete. We will begin our investigation with our hypotheses, then teams will be sent out to test our hypotheses. Each team will be responsible for locating a grassy downward slope, a dirt downward slope, and a concrete downward slope. Each team will have a small bowl of water (filled by our trusty rain barrel!) which they will pour down their slope, and then will measure how far the water traveled with a tape measure. Each group will write down their observations, and then share their findings with the class. During this share-out, we touched on the implications that surface runoff has on pollution and erosion.


For our final week, we returned to our 1st rendition of our water cycle drawings to create a more complete diagram of the water cycle. Since all the students are more familiar with each phase, and how they interact with one another, they have a more holistic understanding of the entire cycle.
We closed our water cycle lesson plan with a circle discussion. Students could pick among the following questions:


I had such an amazing time with our 3rd graders during these lessons. The kids were engaged with all the experiments that we did and so excited to learn and ask questions. It was a great opportunity to work with the students to combine such a staple topic in the scope of our school garden.
The farm celebrated Random Acts of Kindness Week with the Garden Buds Gift Exchange, a culinary event highlighting reciprocity between 1st and 5th grade garden students!

In preparation for the event, 5th graders learned how to make bagels from scratch. They boiled and baked off plenty to share with their 1st grade buddies at the gift exchange.


To show their appreciation for the special treat, 1st graders picked salal leaves from the food forest they frequently tend to, and pressed them into a heart to make a garden-themed craft!


During the Garden Buds Gift Exchange, 5th grade leaders exercised their culinary skills to teach a group of 1st graders how to make a farm-sourced spread for the bagels they prepared weeks ahead.


After each team finished making the spreads, everyone sat down to enjoy some well-earned bagels together. The 1st graders then handed their craft to the 5th grader who helped them.


Both grades did a wonderful job making their gifts to each other and using materials from the farm to spread kindness and express gratitude. We hope these seeds of friendship bud and bloom well beyond the gift exchange!

While the farm beds rest during winter, we continue to grow food indoors with microgreens! Preparing the young crop seedlings is a fun and simple process. We densely blanket seeds on top of water-saturated soil, then stack them to emulate the conditions in which seeds germinate underground. The weight, moisture, and lack of light exposure allow them to open after just a few days. The shoots that quickly follow their first root are what we enjoy as microgreens! Nearly any seed can be used for microgreens, though pea shoots are the students’ resounding favorite. Sunflower and radish sprouts are also popular on the microgreens menu!


